JTech Pro 44W laser how to focus plywood? This guide dives deep into mastering precise focus for stunning results on plywood. From understanding plywood types to mastering various focusing techniques, we’ll equip you with the knowledge and steps to achieve flawless laser engravings and cuts.
Learn about the specific characteristics of the JTech Pro 44W laser and how its power translates to different plywood thicknesses and types. We’ll cover essential safety precautions and troubleshooting to help you avoid common pitfalls and achieve professional-looking projects.
Introduction to JTech Pro 44W Laser and Plywood
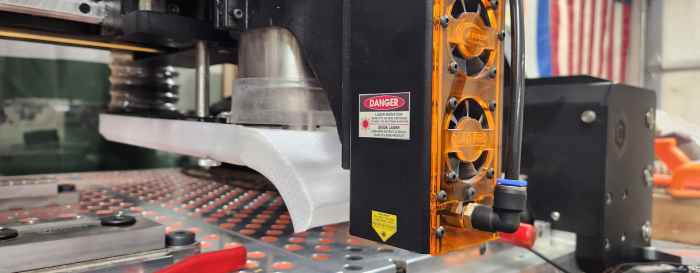
The JTech Pro 44W laser engraver/cutter represents a powerful tool for various material processing tasks. Its 44W output provides ample power for intricate designs and precise cuts on a variety of substrates, including plywood. This laser system, when properly used, can produce high-quality results in a range of applications.This laser is well-suited for plywood due to its ability to quickly and accurately cut or engrave designs.
The high-powered laser beam allows for controlled material removal, ideal for creating intricate patterns and shapes in plywood projects.
Typical Characteristics of the JTech Pro 44W Laser
The JTech Pro 44W laser is known for its relatively fast processing speed and its ability to achieve detailed engravings and cuts. This is crucial for projects that require efficiency and precision, such as custom furniture or decorative elements. The 44W output also allows for versatility in material selection.
Capabilities for Working with Plywood
The 44W laser’s power is suitable for cutting and engraving a variety of plywood thicknesses. Proper focus is crucial for consistent results. Different plywood densities will require adjustments to the focus setting to maintain the desired cut quality.
Common Uses for Plywood with This Laser
This laser can be used for a wide array of plywood applications. Custom furniture designs, decorative wall art, and intricate signage are examples of projects that benefit from the capabilities of this laser. The detailed cuts and engravings add a personalized touch to each piece.
Importance of Proper Focus
Proper focus is critical for achieving high-quality results when working with plywood. Incorrect focus can lead to inconsistent cuts, blurry engravings, or even damage to the laser system. Maintaining the appropriate focal distance ensures precise material removal and optimal engraving detail. A well-focused laser beam produces clean, sharp lines and prevents material distortion. Improper focus can result in uneven or inconsistent cutting, potentially leading to unsatisfactory results.
Consistent focal adjustments throughout the project are key to maintaining quality. Adjustments need to account for varying plywood thicknesses and the specific design’s requirements.
Understanding Plywood Properties for Laser Engraving/Cutting
Plywood, a composite material made from thin layers of wood glued together, presents unique characteristics that significantly impact the laser cutting and engraving process. Understanding these properties allows for optimized settings and predictable results, minimizing material waste and maximizing precision. Proper selection of plywood type and thickness is crucial for successful projects.
Plywood Types and Their Impact
Different plywood types exhibit varying densities and grain structures, leading to diverse responses to laser energy. Hardwood plywood, for example, is typically denser and more resistant to the laser’s heat, requiring adjustments to power and speed settings compared to softwood or composite plywoods. Particleboard, though readily available, often displays a more inconsistent structure, leading to potential issues with irregular cutting or uneven engraving.
Medium-density fiberboard (MDF) offers a more consistent surface and better stability, making it a popular choice for intricate designs.
Plywood Thicknesses
The thickness of the plywood directly influences the laser’s power requirements and cutting parameters. Thicker materials absorb more laser energy, necessitating higher power settings to achieve a clean cut. Thin plywood requires less power and faster speeds to prevent burning or charring. Common thicknesses for laser cutting and engraving range from 3mm to 25mm, with specific thicknesses best suited for different applications.
Comparative Table of Plywood Properties for Laser Cutting
| Plywood Type | Thickness (mm) | Recommended Laser Power | Typical Settings |
|---|---|---|---|
| Hardwood Plywood | 6 | 25-40W | Speed: 100-150mm/s, Power: 50-70% |
| Hardwood Plywood | 12 | 30-45W | Speed: 80-120mm/s, Power: 60-80% |
| Medium-Density Fiberboard (MDF) | 3 | 15-25W | Speed: 150-200mm/s, Power: 30-50% |
| MDF | 6 | 20-35W | Speed: 120-180mm/s, Power: 40-65% |
| Particleboard | 3 | 10-20W | Speed: 200-250mm/s, Power: 20-40% |
| Particleboard | 9 | 15-25W | Speed: 150-200mm/s, Power: 30-50% |
Density and Grain Effects
Plywood density significantly affects the laser’s interaction with the material. Denser plywood absorbs more energy, potentially leading to overheating or burning if the laser power isn’t adjusted. The grain structure of the wood, while less pronounced in plywood than solid wood, can still influence the cutting path. A more uniform grain structure generally leads to smoother cuts and more predictable results.
Conversely, a highly textured or uneven grain may require slight adjustments to the cutting parameters to ensure a clean and precise outcome.
Methods for Focusing the JTech Pro 44W Laser
Precise focus adjustment is critical for optimal performance and safety when working with a high-powered laser like the JTech Pro 44W. Incorrect focus can lead to inconsistent cuts or burns, potentially damaging the material or the laser itself. Therefore, understanding and correctly applying the various focusing methods is essential.Careful and methodical adjustment of the laser’s focus is paramount for achieving the desired results and avoiding potential hazards.
The process demands precision and adherence to safety protocols to ensure both the integrity of the material being worked on and the protection of the operator.
Manual Focusing Method
This method relies on visual inspection and physical adjustment of the focus lens. It is a common approach, but requires a keen eye and some experience.
- Start with a relatively large focusing area. Use a test piece of plywood to check the cutting or engraving effect.
- Gradually adjust the focus mechanism, either by rotating a knob or by moving a lens housing, observing the impact on the cutting/engraving quality. This process may involve repeated testing to find the ideal focus point.
- Note the position of the focus mechanism for future reference, and take measurements to accurately record the adjustments.
Software-Assisted Focusing Method
This method integrates software controls with the laser’s physical adjustment mechanism. Software-controlled focusing, where the laser’s focus is adjusted based on the program’s feedback and the laser’s readings, is increasingly popular.
- Calibrate the laser engraver or cutter with the software, providing accurate data for the software to perform calculations.
- Utilize the software’s autofocus function, which automatically adjusts the focus based on real-time feedback. The software guides the laser to the optimum focus for the specific material and settings.
- The software will provide an indication or a visual representation of the focus point and the adjustments made.
Focusing Techniques Comparison
| Focusing Method | Description | Pros | Cons |
|---|---|---|---|
| Manual | Adjusting focus using a manual mechanism. | Simple, relatively inexpensive. | Requires experience and precision, potentially less accurate. |
| Software-Assisted | Utilizing software to automatically adjust focus. | Highly accurate, less operator error. | Requires software compatibility and potentially higher initial cost. |
Safety Precautions During Focusing
“Always prioritize safety when working with high-powered lasers.”
Safety is paramount during the focusing process. Failure to adhere to safety precautions can lead to severe injuries.
- Protective Gear: Always wear appropriate safety glasses with laser protection when adjusting focus.
- Enclosed Area: Conduct focusing procedures in a well-ventilated, enclosed area to contain any stray laser light or particles.
- Proper Training: Thoroughly understand the laser’s operational procedures and safety protocols before any focusing adjustments.
- Material Handling: Ensure that the plywood or other materials being used are securely fastened and stable during the process.
Step-by-Step Procedure for Adjusting Focus
A methodical approach to focus adjustment is essential. The following procedure Artikels the steps for achieving optimal focus.
- Preparation: Ensure the laser engraver or cutter is properly connected and powered on, then verify the software is operational.
- Material Selection: Select a sample piece of plywood, similar to the material you will be working with, to test focus adjustments.
- Initial Setting: Begin with a rough estimation of the laser focus point, using the software’s controls or the manual adjustment mechanism. Ensure you’re in a well-ventilated and enclosed area.
- Observation: Evaluate the quality of the cut or engraving on the test sample. Adjustments are often needed to optimize the result. Observe the edges and the interior details to assess the accuracy of the cut or engraving.
- Refinement: Make small, incremental adjustments to the focus mechanism, observing the effect on the material. Record any adjustments for future reference.
- Validation: Repeat the cutting or engraving process several times to ensure the consistent quality of the results.
- Documentation: Carefully document the specific settings used for each test to help with future adjustments and ensure repeatability.
Practical Examples and Troubleshooting
Mastering the JTech Pro 44W laser engraver/cutter requires understanding both the design and the technical aspects of the process. This section provides practical examples and troubleshooting guidance to ensure successful results when working with plywood. Proper focus and settings are critical for achieving clean cuts and precise engravings.
Sample Designs for Plywood
Different design complexities necessitate varied laser parameters. Simple designs, like a logo or a basic geometric shape, require minimal adjustments. More intricate patterns, such as a complex artwork or a detailed cutout, demand more precision in focus and power settings. A gradual increase in design complexity will allow the user to understand the interplay between the laser’s capabilities and the material’s properties.
- Simple Designs: A monogram, a basic geometric shape (square, circle, triangle), or a short text inscription. These designs are excellent for initial practice and fine-tuning of the laser parameters.
- Moderate Complexity: A more elaborate logo, a stylized floral design, or a simple cutout shape. These designs introduce more intricate lines and curves, requiring more precise focus adjustments.
- Complex Designs: Detailed artwork, intricate patterns, or a custom cutout with multiple shapes and layers. These designs demand thorough understanding of laser parameters and careful focus control to avoid errors.
Common Focusing Issues and Solutions
Troubleshooting is an integral part of the laser engraving/cutting process. Accurate focus is paramount, and any deviation from the optimal setting can lead to various issues.
- Blurry Lines: Blurry lines can result from improper focus, insufficient power, or the use of an incorrect laser setting for the chosen plywood thickness. Refine the focus adjustment until the lines appear sharp and well-defined. Adjust the power level to ensure sufficient energy to cut through the material. Using the appropriate laser settings for the plywood’s thickness is crucial.
- Uneven Cuts: Uneven cuts often stem from inconsistent focus, uneven plywood thickness, or incorrect laser settings. Verify the plywood’s thickness and ensure consistent material handling. Use a fine-tuning process to adjust the laser focus. Make sure the focus adjustment is stable and not causing inconsistencies. Adjusting the laser settings based on the chosen material will lead to smoother and more precise cuts.
- Burning or Charring: Burning or charring occurs when the laser power is excessively high, causing the material to burn before cutting or engraving. Reduce the laser power to a level appropriate for the plywood’s properties and thickness. Adjust focus and verify that the settings are appropriate for the material type. Using the proper material settings will avoid these burning or charring issues.
Focus Adjustment and Settings
The focus adjustment mechanism allows for precise control over the laser’s interaction with the material. Understanding how to use different settings and parameters is crucial for optimal results.
- Manual Focus Adjustment: Manual focus adjustments are achieved by physically manipulating the focus knob. Carefully adjust the focus until the desired effect is achieved.
- Software Settings: Software-based settings influence the laser’s power and speed. Experiment with different settings to discover the optimal parameters for various materials and designs. The laser software provides a means to control the laser’s behavior.
Troubleshooting Table
| Problem | Possible Cause | Solution |
|---|---|---|
| Blurry lines | Incorrect focus, insufficient power, incorrect settings | Adjust focus, increase power (carefully), adjust settings based on plywood thickness. |
| Uneven cuts | Inconsistent focus, uneven plywood, incorrect settings | Refine focus, use consistent plywood thickness, adjust settings accordingly. |
| Burning/charring | Excessive laser power, incorrect focus | Reduce laser power, adjust focus, verify settings. |
| Poor engraving quality | Incorrect focus, low power, incorrect settings | Adjust focus, increase power (carefully), adjust settings based on plywood thickness and design complexity. |
Safety Considerations and Best Practices
Laser engraving and cutting, even with a powerful machine like the JTech Pro 44W, require strict adherence to safety protocols. Ignoring these precautions can lead to severe injuries and damage to property. A thorough understanding of safety procedures and the inherent risks associated with laser operation is paramount for safe and effective use.
Importance of Personal Protective Equipment (PPE)
Proper personal protective equipment (PPE) is critical for safeguarding users from potential hazards. Eye protection is absolutely essential. Laser radiation can cause severe and permanent eye damage, even at low levels of exposure. High-quality laser safety glasses specifically designed for the 44W laser wavelength are mandatory. Additionally, appropriate clothing, such as long sleeves and pants, should be worn to protect skin from stray sparks or debris.
Heat-resistant gloves may also be necessary, depending on the material being processed. The risk of burns from the laser’s intense heat and sparks is significant and must be addressed.
Safe Operating Procedures for the JTech Pro 44W Laser
Operating the JTech Pro 44W laser requires a structured approach to prevent accidents. Always consult the manufacturer’s manual for detailed instructions. The machine should be properly secured to a stable surface to prevent movement during operation. Never operate the laser if the enclosure or components are damaged. Before initiating any laser cutting or engraving process, thoroughly inspect the work area for potential hazards.
Ensure the laser is properly focused and aligned to the material. Unattended operation of the laser is strictly prohibited.
Essential Safety Precautions for Laser Work
A comprehensive list of safety precautions is crucial for preventing accidents. These precautions include:
- Never look directly into the laser beam, even with safety glasses.
- Ensure the laser enclosure is properly closed and secured during operation.
- Maintain a safe distance from the laser beam and the machine’s exhaust system.
- Do not use the laser in areas with flammable materials or gases.
- Always use the appropriate material handling tools and techniques to prevent injuries.
- Regularly inspect the laser equipment for damage and malfunctions.
- Store all laser-related materials and tools in a designated, safe area when not in use.
- Follow established emergency procedures in case of accidents.
Importance of Proper Ventilation, Jtech pro 44w laser how to focus plywood
Laser cutting and engraving processes often generate fumes and particulate matter. Adequate ventilation is essential to remove these harmful substances from the work area. Poor ventilation can lead to respiratory problems and other health issues. A well-ventilated area, either through dedicated exhaust systems or by maintaining open windows and doors, is crucial. Consider the material being processed and its potential for producing harmful fumes when selecting or implementing ventilation strategies.
Understanding Laser Safety Regulations and Standards
Laser safety regulations and standards are crucial for protecting operators and others from laser hazards. Compliance with these regulations ensures safe operation and adherence to established safety protocols. Consult local and national regulations governing laser usage for detailed information. Adhering to safety standards is not just a precaution, but a legal requirement in many jurisdictions. Familiarizing yourself with the relevant standards and regulations is a critical aspect of laser safety.
Final Conclusion
Successfully focusing your JTech Pro 44W laser on plywood is achievable with the right knowledge and practice. By understanding plywood properties, employing effective focusing techniques, and prioritizing safety, you can create intricate designs and achieve perfect cuts. This comprehensive guide provides a clear path to mastery, allowing you to confidently tackle any plywood project.
Popular Questions: Jtech Pro 44w Laser How To Focus Plywood
What are the typical settings for cutting 12mm hardwood plywood with the JTech Pro 44W laser?
Unfortunately, the provided Artikel doesn’t specify settings for 12mm hardwood plywood. You’ll need to experiment with different speeds and power settings to find the optimal balance for your specific laser and plywood.
What safety glasses should I use?
Always use laser safety glasses specifically designed for the wavelength and power of your laser. Consult the manufacturer’s recommendations for proper safety eyewear.
What are the common causes of blurry lines when cutting plywood?
Blurry lines can stem from incorrect focus adjustments, uneven plywood surfaces, or issues with the laser’s alignment. Consult the troubleshooting table in the Artikel for specific solutions.
Can I use this guide for other laser types besides the JTech Pro 44W?
While the specifics are for the JTech Pro, the general principles of focus adjustment, plywood properties, and safety considerations apply to many laser cutters and engravers.