The Ultimate Guide To Removing And Installing Wiper Blades on Your Subaru Impreza

The Ultimate Guide To Removing And Installing Wiper Blades on Your Subaru Impreza

The Ultimate Guide To Removing And Installing Wiper Blades on Your Subaru Impreza

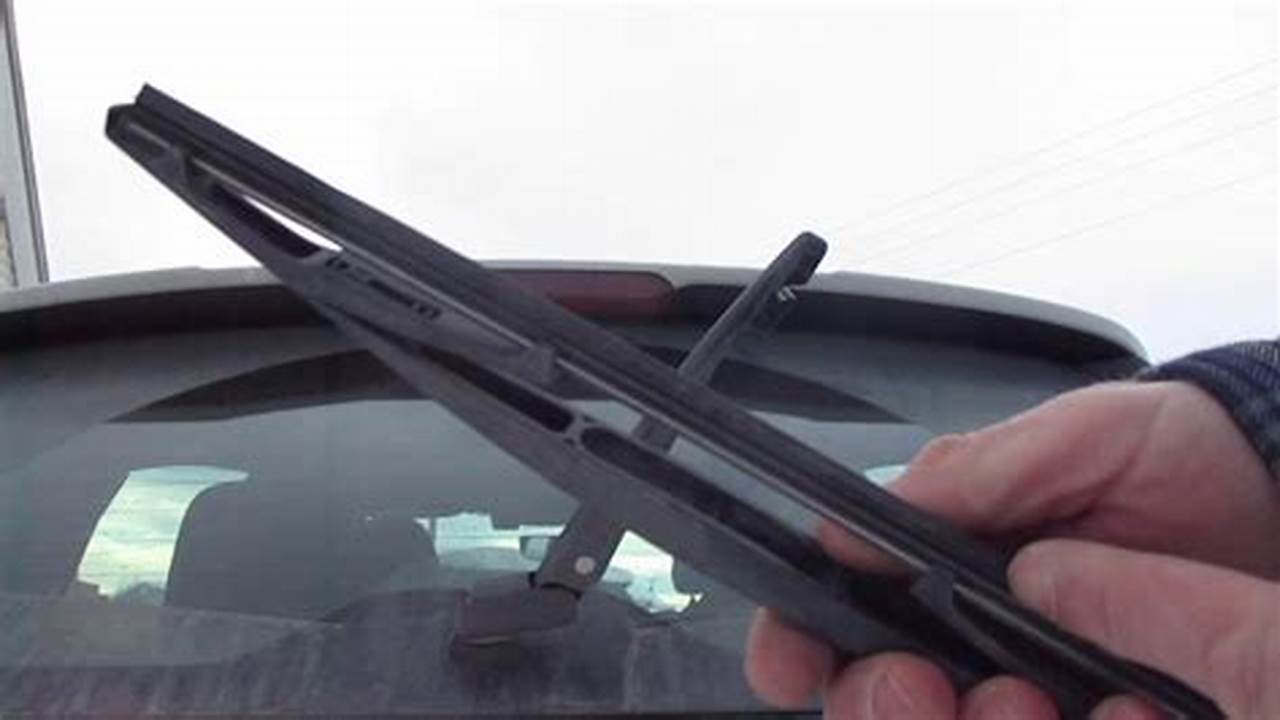
Replacing wiper blades on a Subaru Impreza is a relatively simple task that can be completed in a few minutes. Wiper blades are an important part of your car’s safety system, so it’s important to keep them in good condition. Worn or damaged wiper blades can reduce visibility, which can lead to accidents.

There are two types of wiper blades: conventional wiper blades and beam wiper blades. Conventional wiper blades have a metal frame with a rubber blade attached to it. Beam wiper blades are made of a single piece of rubber with a metal insert. Both types of wiper blades are effective at removing water and debris from your windshield, but beam wiper blades are generally more durable and longer-lasting than conventional wiper blades.

Read more

How to Effortlessly Remove Your Freestyle Libre 3: A Step-by-Step Guide

How to Effortlessly Remove Your Freestyle Libre 3: A Step-by-Step Guide

How to Effortlessly Remove Your Freestyle Libre 3: A Step-by-Step Guide

Removing the Freestyle Libre 3 sensor is a simple process that can be completed in a few steps. To begin, wash your hands and the area around the sensor with soap and water. Next, gently peel back the edges of the adhesive patch that is holding the sensor in place. Once the edges are peeled back, slowly and carefully pull the sensor away from your skin. If you experience any resistance, do not pull too hard. Instead, gently wiggle the sensor back and forth until it comes loose. Once the sensor is removed, dispose of it properly according to the manufacturer’s instructions.

Removing the Freestyle Libre 3 sensor is an important step in the process of using the device. By following the steps outlined above, you can safely and easily remove the sensor when it is time to replace it.

Read more

A Comprehensive Guide: Removing the Rear Drive Axle of a Toro Recycler 22" Lawn Mower

A Comprehensive Guide: Removing the Rear Drive Axle of a Toro Recycler 22" Lawn Mower

A Comprehensive Guide: Removing the Rear Drive Axle of a Toro Recycler 22" Lawn Mower

Removing the rear drive axle on a Toro Recycler 22 lawn mower is a necessary step for certain repairs and maintenance tasks. This guide will provide a step-by-step process on how to safely and effectively remove the rear drive axle.

The rear drive axle is a crucial component of the Toro Recycler 22 lawn mower, transmitting power from the engine to the rear wheels and enabling the mower to move. Removing the rear drive axle allows for access to other components, such as the transmission and differential, for inspection, repair, or replacement.

Read more

Ultimate Guide: How To Remove Camry Multilink Fuse Like a Pro

Ultimate Guide: How To Remove Camry Multilink Fuse Like a Pro

Ultimate Guide: How To Remove Camry Multilink Fuse Like a Pro

Removing the Camry multilink fuse is a relatively simple process that can be completed in a few minutes. The multilink fuse is located in the fuse box under the hood of the car. To remove the fuse, simply use a pair of needle-nose pliers to gently pull it straight out of the fuse box.

The multilink fuse is responsible for powering the car’s transmission. If the fuse blows, the transmission will not be able to shift gears and the car will not be able to move. It is important to replace a blown multilink fuse as soon as possible to avoid further damage to the car.

Read more

How to Effortlessly Remove a Chevy Silverado Thermostat (2016 Model)

How to Effortlessly Remove a Chevy Silverado Thermostat (2016 Model)

How to Effortlessly Remove a Chevy Silverado Thermostat (2016 Model)

Replacing the thermostat in a 2016 Chevy Silverado is a relatively simple task that can be completed in about 30 minutes. The thermostat is responsible for regulating the engine’s temperature by opening and closing to allow coolant to flow through the radiator. A faulty thermostat can cause the engine to overheat or run too cool, so it’s important to replace it if it’s not working properly.

To replace the thermostat, you will need a new thermostat, a 3/8-inch socket wrench, and a bucket to catch the coolant that will drain out when you remove the old thermostat. Once you have gathered your tools, follow these steps:

Read more

The Ultimate Guide to Removing Red Stains from Carpet: Easy and Effective Solutions

The Ultimate Guide to Removing Red Stains from Carpet: Easy and Effective Solutions

The Ultimate Guide to Removing Red Stains from Carpet: Easy and Effective Solutions

Red stains on carpets can be caused by various substances, including food, drinks, and even pet accidents. Removing these stains promptly and effectively is crucial to prevent them from setting and becoming permanent. Fortunately, there are several methods that can be employed to remove red stains from carpets, depending on the type of stain and the carpet’s material.

The importance of removing red stains from carpets lies in preserving the carpet’s aesthetic appeal and preventing further damage. Red stains can be unsightly and detract from the overall appearance of a room. Moreover, if left untreated, the stains may attract dirt and dust, leading to a build-up that can damage the carpet’s fibers. In some cases, red stains can also indicate the presence of underlying damage, such as a burn or a spill of a corrosive substance. Addressing these stains promptly can help mitigate further damage and ensure the carpet’s longevity.

Read more

The Ultimate Guide to Removing Pant Cuffs: A Step-by-Step Tutorial

The Ultimate Guide to Removing Pant Cuffs: A Step-by-Step Tutorial

The Ultimate Guide to Removing Pant Cuffs: A Step-by-Step Tutorial

Removing cuffs from pants is a simple tailoring task that can be done at home with a few basic tools. Cuffs are the folded-over fabric at the bottom of pant legs, and they can be removed to give pants a more casual or modern look.

There are a few different ways to remove cuffs from pants, but the most common method is to use a seam ripper. A seam ripper is a small, sharp tool that is used to cut through fabric seams. To remove a cuff using a seam ripper, simply insert the seam ripper into the seam at the bottom of the cuff and carefully cut through the threads. Once the threads are cut, the cuff can be pulled away from the pant leg.

Read more

Step-by-Step Guide: How to Effortlessly Remove Your Patio Screen Door

Step-by-Step Guide: How to Effortlessly Remove Your Patio Screen Door

Step-by-Step Guide: How to Effortlessly Remove Your Patio Screen Door

Removing a patio screen door can be a necessary task for cleaning, repairs, or replacement. The process involves disengaging the door from its frame and carefully lifting it out. Before beginning, ensure you have a clear workspace and any necessary tools, such as a screwdriver or hex key.

Patio screen doors provide several benefits. They allow for ventilation while keeping insects and debris out, making them ideal for outdoor living spaces. Additionally, they can enhance privacy and provide an extra layer of security. Historically, screen doors have been used for centuries, with the first recorded use dating back to ancient Egypt.

Read more

Step-by-Step Guide: How to Safely Remove a Circuit Breaker

Step-by-Step Guide: How to Safely Remove a Circuit Breaker

Step-by-Step Guide: How to Safely Remove a Circuit Breaker

A circuit breaker is a safety device designed to protect an electrical circuit from damage caused by overcurrent or short circuit. Removing a circuit breaker is a relatively simple task that can be completed in a few steps.

Circuit breakers are typically located in a panel, either indoors or outdoors. To remove a circuit breaker, first, turn off the power to the panel at the main breaker. Once the power is off, open the panel door and locate the circuit breaker you want to remove. Grip the circuit breaker firmly and pull it straight out of the panel. Be careful not to touch the metal contacts on the circuit breaker.

Read more

Ultimate Guide: Removing an Old Camera from a 2015 Subaru Impreza Sedan

Ultimate Guide: Removing an Old Camera from a 2015 Subaru Impreza Sedan

Ultimate Guide: Removing an Old Camera from a 2015 Subaru Impreza Sedan


2015 Subaru Impreza Sedan How To Remove Old Camera refers to the process of extracting an outdated camera from a specific vehicle model. This task involves understanding the camera’s placement, identifying its connections, and carefully detaching it without causing damage to the vehicle or its components.

Removing an old camera from a 2015 Subaru Impreza Sedan is significant for several reasons. It allows for the installation of a new or upgraded camera system, enhancing visibility and safety features. Additionally, it may be necessary for repairs or maintenance purposes, ensuring the proper functioning of the vehicle’s camera-based systems.

Read more